Start an indoor worm bin without odors or guesswork.
A worm bin is a small livestock system, not a sealed scrap bucket. Give red wigglers air, damp bedding, moderate temperature, and less food than you think. The result should smell like damp earth and fit the home you have now.
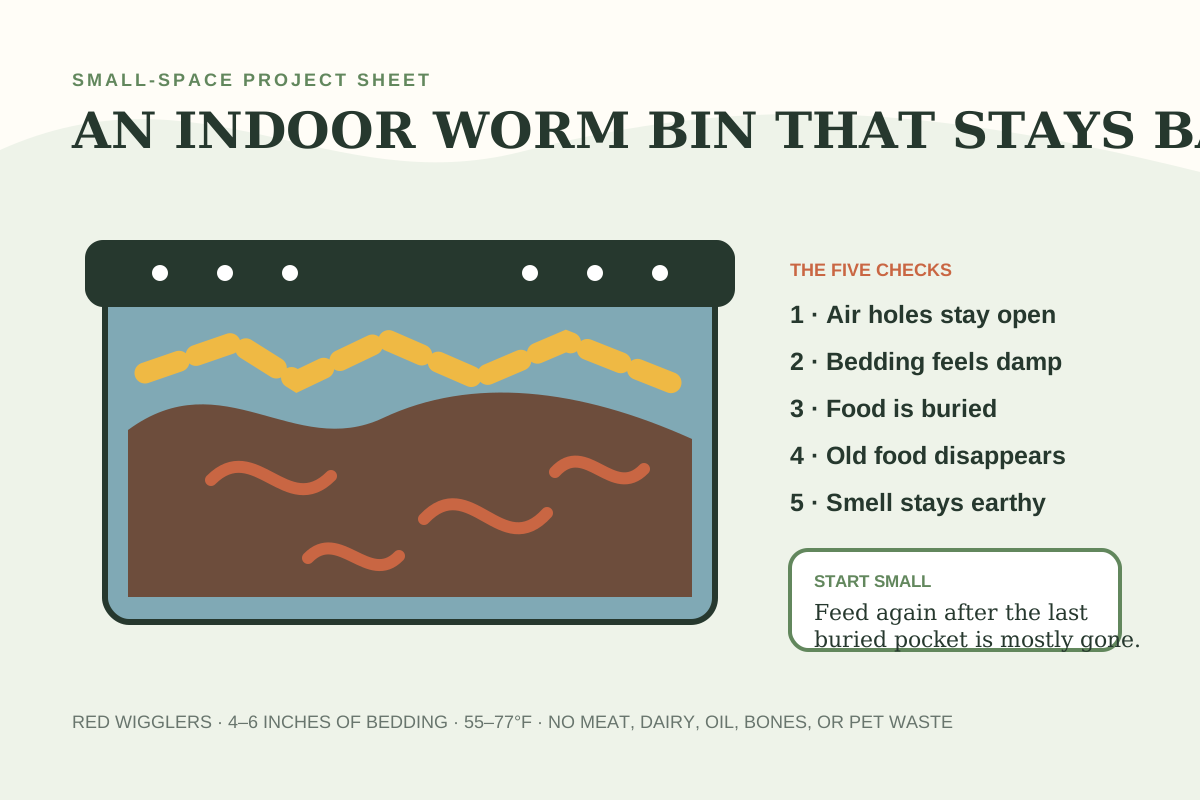
Outdoor compost slows when cold weather arrives, and apartment residents may not have a legal place for a pile. Vermicomposting offers another lane: surface-dwelling compost worms and microorganisms process a limited stream of food scraps in a shallow, aerated bin. Oregon State University Extension identifies it as useful for people without room for a conventional bin.
“Indoor” does not mean automatic. Worms breathe through moist skin, need oxygen, and respond quickly when bedding becomes waterlogged, acidic, hot, dry, or packed with more food than the system can process. A successful bin is quiet because its keeper watches a few repeatable signals.
This guide covers a modest household bin for plant scraps, coffee grounds with paper filters, suitable paper tea bags, crushed eggshells, and carbon-rich bedding. It does not cover commercial systems, manure, pet waste, animal products, invasive-species disposal, or packaging labeled merely “compostable.” Check the lease, building rules, local waste guidance, and local Extension advice before bringing worms home.
Choose vermicomposting for the scraps it can handle
A worm bin complements the basic outdoor compost bin; it does not shrink every household waste stream into one container. Fruit and vegetable trimmings, coffee grounds and paper filters, paper tea bags without staples or plastic, and modest amounts of crushed eggshell are standard inputs in EPA and Extension guidance. Small pieces break down faster than large, woody chunks.
Keep meat, fish, bones, dairy, fats, oils, greasy food, and pet waste out of a beginner indoor bin. These materials can create odor, pest, pathogen, and balance problems. Oregon State and EPA also advise limiting or avoiding large amounts of citrus, onion, and garlic. Remove produce stickers, plastic-coated paper, staples, and synthetic tea bags. A marketing label does not establish that an item belongs in a small home system.
For one week, weigh only scraps that qualify. This avoids sizing the bin around food that should go elsewhere. If cooking creates irregular bursts, keep a municipal, community, outdoor, or temporary freezer route for overflow. The worm bin should not become an obligation to feed everything.
Size the bin from a measured week
Oregon State offers a conservative planning relationship: about one cubic foot of bin space for each pound of kitchen waste per week and about one pound of worms per pound of weekly waste. Its example keeps bin depth near one foot because red wigglers are surface dwellers and a shallow profile supports aerobic conditions.
Those numbers describe capacity, not a command to add the full amount on day one. New bedding has fewer established microbes, worms need time to acclimate, and scraps vary in water content. Begin below the planned rate. Add food only when the previous pocket is mostly transformed and does not smell sour or rotten.
A wide opaque plastic storage bin can work when converted using a trusted ventilated and drained design. A purpose-built stacking bin can also work. Ask whether air can enter, excess liquid can drain without damaging floors, the lid excludes light without sealing the bin, and the container can be lifted and cleaned in the available space.
Do not assume a sealed tote is safer because insects cannot enter. It also restricts oxygen. If building requires tools outside your skill or lease, buy a suitable bin or ask a local compost program for a proven model. Place every indoor system on a washable waterproof tray.
Pick a stable location before ordering worms
Oregon State says red wigglers thrive from about 55°F to 77°F, although they tolerate a wider range. A pantry, utility room, basement, or space under a sink may work when it stays stable, remains accessible, and has no plumbing leak or chemical-storage conflict. Avoid direct sun, heaters, freezing walls, hot garages, and vibrating washers or dryers.
Keep the bin where it can be inspected without moving furniture and out of reach of children or pets who may open it or eat scraps. Store cleaners separately and never spray pesticides into the bin. A thermometer near the bedding during the first season helps connect activity with cold windows, heating vents, and weather.
Balconies can swing from hot sun to freezing nights and may have rules about drainage, insects, and wildlife. If the bin moves outside seasonally, protect it from rain, wind, temperature extremes, rodents, and raccoons, and plan the indoor move before autumn temperatures fall.
Use red wigglers, not worms from the yard
The preferred bin worm is the red wiggler, Eisenia fetida, also called red worm, manure worm, or tiger worm. It naturally lives near the surface in rich decaying matter. Common garden earthworms and nightcrawlers occupy different habitats and do not thrive in the same shallow indoor system.
Buy from a reputable compost-worm supplier or obtain a starter population from a healthy local bin, Extension Master Gardener program, or solid-waste program. Confirm the species, shipping conditions, and whether quoted weight includes bedding. A package labeled “bait worms” does not guarantee the right species.
Prepare the habitat before worms arrive. Never release purchased worms, bedding, cocoons, or unfinished vermicompost into natural areas. Earthworm risks and rules differ by region; follow local invasive-species and Extension guidance for containment and disposal.
Make four to six inches of damp, springy bedding
Oregon State recommends four to six inches of bedding and suggests mixing suitable materials such as hand-shredded non-glossy newspaper or office paper, small corrugated-cardboard pieces, straw, coconut coir, or inspected partly decomposed leaves. Remove plastic tape, labels, staples, and coated surfaces.
Moisten the material before adding worms. Aim for the feel of a wrung-out sponge: damp throughout, with air spaces, but not dripping. Add water gradually, toss, wait for absorption, and check several handfuls. If squeezing releases a stream, add dry bedding and fluff. If paper stays stiff and dusty, add a little more water.
Bedding is habitat and part of the food web. Keep dry shredded paper or cardboard beside the bin. It is the quickest correction for a wet surface, exposed food, or a shrinking bedding layer. Fluff gently when material compacts, without repeatedly disturbing the whole system.
Some complete plans include a small amount of soil or grit. Follow the setup guidance you choose. Do not add garden soil that may contain pesticides, pests, invasive worms, or unknown contaminants, and do not treat lime, fertilizer, or commercial “worm food” as an automatic cure.
Feed one buried pocket, then observe
Trusted sources describe several workable starts: food in bedding before worms, worms acclimating before food, or both together. Choose one complete plan. A beginner-friendly sequence is prepared bedding, worms, one quiet day, then a small portion of chopped scraps buried in one corner.
Cover every pocket with about two inches of bedding or finished material. Covered scraps are less accessible to fruit flies and remain within the active habitat. Mark the location in a notebook. At the next inspection, look there before opening another pocket.
Food should soften and lose its original form. Fibrous stems, peels, and cobs take longer than tender scraps. Chop tough pieces smaller, but do not blend food into a dense wet slurry. Freezing and thawing can soften scraps but also releases water, so drain excess liquid and count that moisture.
EPA guidance says to add more only after earlier food has been consumed. That is safer than feeding a fixed maximum based on worm weight. If recognizable food accumulates, stop feeding and add bedding rather than asking the worms to catch up.
Run a five-minute weekly inspection
- Smell: healthy material smells earthy; sour, rotten, or ammonia-like odor needs correction.
- Surface: food stays buried and covered; flies should not have an exposed site.
- Moisture: bedding feels damp and springy without puddles or streaming liquid.
- Air: vents stay open and bedding is not a compact wet mat.
- Food: inspect the last pocket before deciding what to add.
- Worms: most remain in bedding rather than massing on the lid.
- Temperature: record unusual heat, cold, or room changes.
Keep the log simple: date, food type and weight, bedding, moisture, odor, temperature, pests, and next action. The useful number is what the bin actually processed without odor or insects. After four calm weeks, increase food in small steps only when old pockets disappear.
If away for two or three weeks, Oregon State says a healthy bin can often manage when fed beforehand, given enough bedding, and protected from temperature and moisture extremes. Do not add a huge farewell meal.
Troubleshoot the condition, not the symptom
| What you see | Likely causes | First response |
|---|---|---|
| Rotten odor | Too much food, water, compaction, poor air, unsuitable inputs | Stop feeding, remove problem food, add dry bedding, restore air |
| Fruit flies | Exposed scraps, overfeeding, infested produce, too little cover | Bury food, add dry top bedding, pause feeding, remove backlog |
| Escaping worms | New-bin adjustment or wet, dry, hot, cold, acidic, compacted habitat | Check temperature, moisture, odor, food, bedding, and vents |
| Standing liquid | Wet food, excess water, blocked drainage, too little bedding | Stop wet feed, clear drainage, add dry bedding |
| Dry paper | Low moisture, warm room, excess ventilation | Add water gradually and correct the location |
| Food remains | Overfeeding, large pieces, cold, unhealthy population | Stop feeding, remove excess, chop future portions |
Mites can increase with overfeeding or acidic conditions. Ants can indicate dryness. Centipedes are predators. Identify organisms through local Extension before applying any remedy. Do not pour bleach, insecticide, vinegar, salt, fertilizer, or essential oils into the bin.
If fruit flies appear, correct access: smaller portions, no backlog, buried food, and a dry bedding cover. Illinois Extension recommends these steps. Traps may catch adults in the room but do not fix breeding food. Identify whether the insect is actually a fruit fly, fungus gnat, or drain fly because the source may be a houseplant or drain.
Harvest dark, crumbly material and keep the worms
Vermicompost commonly takes about three to six months. Oregon State describes finished material as dark, crumbly, earthy-smelling, and similar to chocolate cake. A bin should be harvested periodically because a high concentration of castings becomes a poor worm habitat.
For a side-feeding harvest, stop feeding the whole surface, place new food and bedding on one side for a couple of weeks, then remove finished material from the other side while returning visible worms and unfinished pieces. Another method uses light to encourage worms inward as small amounts are removed. Protect worms from prolonged light and drying, and wash hands after handling the bin.
Vermicompost can contain viable seeds because the bin is not a hot-composting system. It may contain worms or cocoons. Remove them before use in indoor pots, and follow regional guidance before taking live material outdoors.
Use castings as an amendment, not a potting mix
Vermicompost does not supply the structure and drainage of a complete container medium. Oregon State suggests blending it with potting soil, commonly around 25 percent of container volume, or using a light topdressing away from stems and trunks. Local recommendations and plant needs should determine the amount.
Start with a small labeled test on established plants. Do not assume more creates more growth. If a pot has disease, drainage, or nutrient problems, diagnose those separately. Pair this project with the four-bin potting-mix sort: castings can add organic matter, but cannot sanitize diseased mix or restore collapsed structure.
Liquid in a catch tray is drainage, not automatically a brewed or tested compost tea. Persistent liquid means the bin is too wet. Manage bedding first and follow local Extension guidance for disposal or use. Do not apply unknown leachate to edible leaves or claim it is pathogen-free.
Build a two-route scrap plan
A worm bin is resilient when it has relief. Municipal collection, community drop-off, an outdoor pile, or temporary freezer storage can absorb holiday peels, travel interruptions, and the first month while the bin establishes.
This prevents the bin from becoming a moral test. The goal is a stable project that teaches observation and diverts a realistic amount, not a claim that every scrap must go into one box.
A 30-day startup schedule
| Week | Project | Success signal |
|---|---|---|
| Before worms | Measure scraps, check rules, select site, build and leak-test bin | Capacity and overflow route are written |
| Week 1 | Add damp bedding and worms; feed one small buried pocket | Worms settle; no rotten odor |
| Week 2 | Inspect first pocket; add bedding and a second portion only if ready | Old food is softening and reducing |
| Week 3 | Check temperature, moisture, vents, flies, and weight | Damp airy bedding; earthy smell |
| Week 4 | Review log and set a conservative feeding rate | No backlog; overflow route used when needed |
At day 30, resist scaling up solely because worms remain alive. A calm bin with disappearing food is the foundation. Continue the same rate or increase in one measured step, and plan the first harvest before material reaches the vents.
Questions new worm keepers ask
Will an indoor worm bin smell?
A balanced aerobic bin should smell earthy. Foul odor signals overfeeding, excess water, compaction, exposed food, or an unsuitable input.
Can I use worms from the yard?
No. Garden worms and nightcrawlers occupy different habitats. Use a verified compost species such as Eisenia fetida.
How much should I feed?
Start with a small buried portion and inspect it before adding more. Capacity formulas size a mature system; observed processing controls a new bin.
Should liquid collect below?
A little drainage may occur, but repeated standing liquid means excess moisture. Clear drainage, add dry bedding, reduce wet food, and restore air.
What if I travel?
A healthy bin with adequate bedding and stable conditions can often manage for two or three weeks. Feed normally rather than adding an oversized meal.
Sources and review notes
Researched and reviewed October 19, 2026. Habitat, species, sizing, bedding, food, temperature, pests, harvest, and use guidance was checked against:
- Oregon State University Extension — Composting with Worms.
- U.S. Environmental Protection Agency — Composting at Home.
- U.S. EPA — How to Create and Maintain an Indoor Worm Composting Bin.
- University of Illinois Extension — Vermicomposting Questions and Answers.
- University of Minnesota Extension — Earthworms and regional ecological risk.
Public discussions were used to identify recurring concerns about odor, flies, escaping worms, feeding, leachate, apartments, and travel. Recommendations were resolved against official sources. Local rules, climate, invasive-species guidance, and building agreements may require a different choice.